

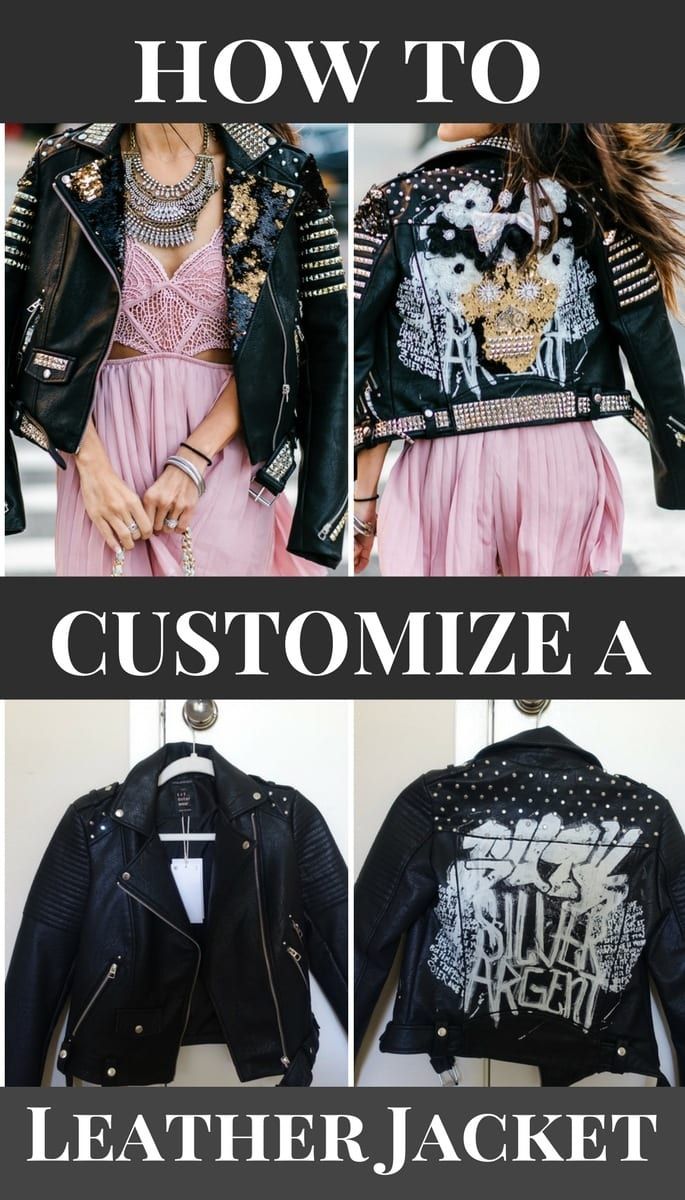
There’s nothing quite like a well-loved leather jacket. It’s classic, edgy, and effortlessly cool. But what if you could make it even more you? Customizing your leather jacket with DIY patches and paint is a fun and creative way to breathe new life into an old favorite—or turn a thrift store find into a one-of-a-kind statement piece.
Whether you’re going for punk-rock vibes, vintage flair, or modern artistic expression, this guide will walk you through the process of turning a plain leather jacket into your personal canvas.
Why Customize Your Leather Jacket?
Custom leather jackets have always been a symbol of rebellion, individuality, and creativity. From punk rockers in the ‘70s to street-style stars today, people have used leather jackets to make bold statements. By customizing your jacket, you’re not only creating wearable art—you’re also reducing waste and giving new life to a piece you might’ve otherwise left hanging in your closet.
What You’ll Need
Before you dive in, here’s a quick list of supplies to gather:
For Painting:
-
Leather acrylic paint (brands like Angelus are great)
-
Paintbrushes or paint pens
-
Painter’s tape (for clean lines)
-
Rubbing alcohol or acetone (for surface prep)
-
Pencil or chalk (for sketching designs)
-
Clear acrylic finisher or sealant
For Patches:
-
Iron-on, sew-on, or glue-on patches
-
Strong fabric glue (E6000 or similar)
-
Needle and thread (preferably heavy-duty)
-
Thimble (optional but helpful)
Tip: Try local thrift stores or Etsy for unique patches, or make your own with embroidery or printable fabric sheets.
Step 1: Plan Your Design
Start by thinking about your jacket’s “story.” What do you want it to say about you? Sketch out ideas or create a digital mock-up. Think about:
-
Themes (e.g., music, astrology, floral, punk, retro)
-
Patch placement: back panel, sleeves, collar, or chest
-
Paint design: abstract patterns, lettering, logos, or artwork
Don’t be afraid to mix patches and paint—it creates texture and makes your jacket pop.
Step 2: Prepping Your Jacket
Before painting or applying patches, clean the surface with a rubbing alcohol wipe. This removes dirt and oils that could prevent paint or glue from sticking. If the leather is glossy, lightly scuff it with fine-grit sandpaper to help the paint adhere better.
Step 3: Painting Your Jacket
Tips for Success:
-
Start light: Use pencil or chalk to sketch your design.
-
Use thin layers: Build color slowly to avoid cracking.
-
Tape off areas if you want clean, sharp lines.
-
Dry between coats: Let each layer dry before adding the next.
-
Seal it: Once finished, use a leather-safe sealant to protect your work.
Popular ideas include flames, galaxy art, inspiring quotes, smiley faces, or even minimalist symbols. Make it personal!
Step 4: Adding Patches
You can either sew, glue, or iron on your patches. Here’s a breakdown:
Sew-On:
Best for long-lasting wear. Use a strong needle and thread—leather is tough. Go slow and steady.
Iron-On:
Works on thinner jackets but may not adhere well to thick or treated leather. Always use a cloth between the patch and iron to avoid burning.
Glue-On:
Quick and easy, but less durable. Use fabric glue specifically designed for leather.
Tip: Test placement by taping patches temporarily before committing!
Step 5: Style It Up
You did it—your jacket is now a wearable masterpiece! Pair it with basics to let it shine, or layer it over a hoodie or dress for a bold look. Your custom jacket tells a story, so wear it with confidence.
Maintenance Tips
-
Spot clean only—avoid machine washing.
-
Use a leather conditioner occasionally to keep it supple.
-
Store on a hanger to maintain shape.
-
If paint cracks or fades, touch up gently with a fine brush.
Final Thoughts: Start Creating
Customizing your leather jacket is more than just a craft—it’s a way to showcase your personality and creativity. Whether you’re a seasoned artist or just looking for a fun weekend project, this is your sign to go for it.
Have you created your own DIY jacket? Tag us on Instagram or drop a pic in the comments—we’d love to see what you’ve made.